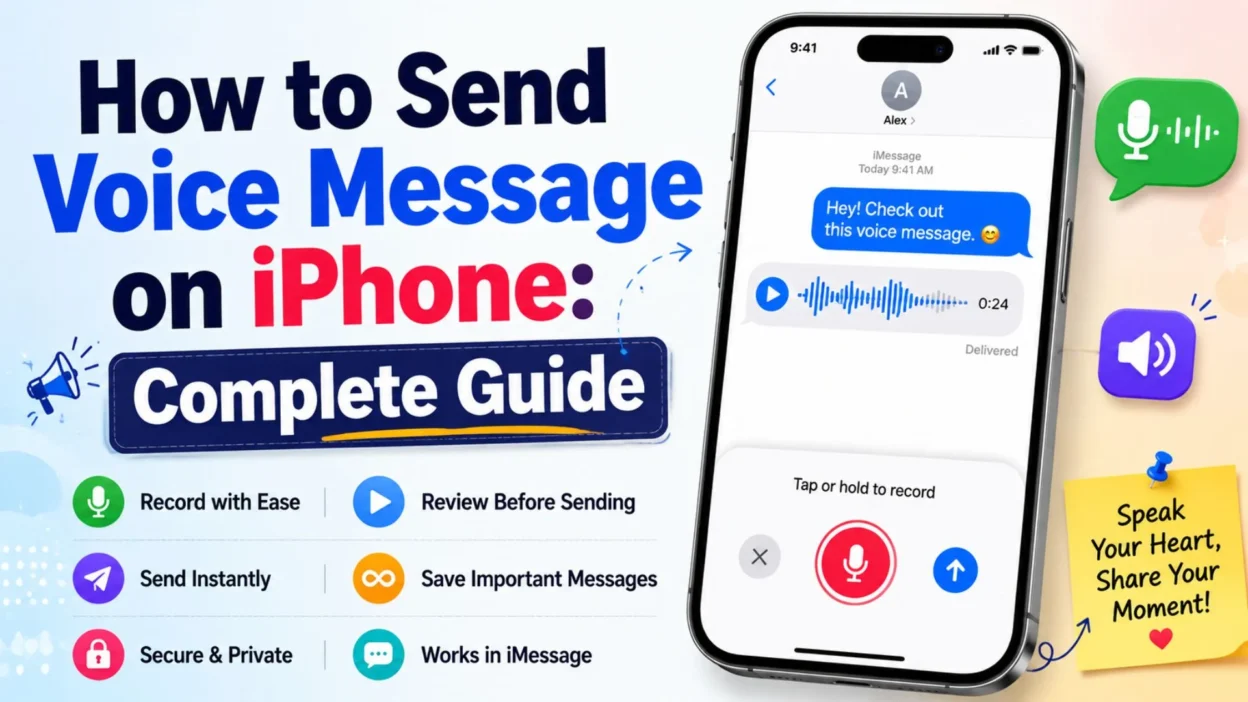
Knowing how to send voice message on iPhone can make everyday conversations feel easier and more personal. Instead of typing a long paragraph, you can record your voice within seconds.
A voice message can carry emotion that plain text sometimes misses. Your tone may show excitement, kindness, concern, or affection more clearly.
Sometimes, we all feel too busy to type. Perhaps you are walking, cooking, travelling, or handling several tasks. In those moments, an audio message offers a simple solution.
Fortunately, the iPhone Messages app includes a built-in audio feature. You can record, review, continue, cancel, or send your message without leaving the conversation.
“A short voice message can make an ordinary conversation feel warmer, clearer, and more personal.”
This guide explains every step carefully. It also covers saving messages, avoiding mistakes, and understanding how the feature works.
What Is a Voice Message on iPhone? 🎙️
A voice message is a short audio recording sent through a conversation. The receiver can play it directly inside the Messages app.
Apple officially calls these recordings audio messages. However, many people search for them as voice messages, voice notes, or recorded messages.
Unlike dictation, an audio message sends your actual voice. Dictation only converts spoken words into written text.
Voice messages are helpful because they allow you to:
- ❤️ Express feelings through your natural tone
- ⏰ Save time when typing feels inconvenient
- 🗣️ Explain detailed information more clearly
- 👨👩👧 Stay connected with friends and family
- 💼 Share a quick work update
- 🌍 Communicate while travelling or multitasking
- ✨ Make a simple message feel more personal
However, always record safely. Avoid using your phone while driving or crossing a busy road.
How to Send Voice Message on iPhone 📱
The current Messages app places the audio option inside the Add menu. Therefore, you may not see a microphone button immediately.
Follow these steps:
- 💬 Open Messages: Launch the Messages app on your iPhone.
- 👤 Choose a conversation: Open an existing chat or begin a new message.
- ➕ Tap the Add button: Select the plus button beside the message field.
- 🎙️ Choose Audio: Tap the Audio option from the available features.
- 🗣️ Start speaking: Recording begins, so speak clearly into your iPhone.
- ⏹️ Stop recording: Tap the Stop button when you finish.
- ▶️ Review the audio: Tap Play to hear your recording before sending.
- ⬆️ Send the message: Tap the Send arrow when you feel satisfied.
Apple also allows you to continue recording, review the message, or cancel it before sending. Therefore, you do not need to send an imperfect recording.
Keep the phone at a comfortable distance while speaking. Holding it too close may make your voice sound distorted.
Review the Voice Message Before Sending 🔍
Reviewing your recording helps prevent mistakes. For example, you may notice background noise, missing details, or unclear speech.
After stopping the recording, several controls appear:
- ▶️ Play: Listen to the full voice message.
- ➕ Continue recording: Add more audio to the existing message.
- ❌ Cancel: Delete the recording without sending it.
- ⬆️ Send: Deliver the finished audio message.
These controls let you check your words before the recipient hears them. Apple includes each option directly within the recording interface.
If the message sounds unclear, cancel it and begin again. A fresh recording often takes less time than explaining a confusing one later.
Send Follow-Up Audio Messages Faster ⚡
After sending an audio message, you may want to record another one quickly.
Apple provides a faster method for follow-up recordings. Touch and hold the audio-recording control inside the text field, then begin speaking.
This shortcut can help during longer conversations. However, the usual Add → Audio method remains easier for first-time users.
Use the shortcut when:
- 💭 You forgot one important detail
- 😂 You want to respond naturally to a funny message
- 📋 Your explanation requires several short recordings
- ❤️ You are having a warm conversation with someone
- 🧑💼 You need to send quick updates without typing
Short recordings are usually easier to follow. Therefore, consider dividing a long explanation into two clear messages.
Voice Message and Voice Dictation Are Different 🗣️
Many iPhone users confuse audio messages with keyboard dictation. Although both features use your voice, they produce different results.
A voice message sends an audio recording. The receiver hears your real voice, pauses, tone, and emotion.
Dictation works differently. It listens to your speech and converts it into written words inside the text field.
Choose a voice message when:
- 💖 Tone and emotion matter
- 🎉 You are sharing exciting news
- 🤝 You want the message to feel personal
- 📝 The information is easier to explain aloud
- 😔 You need to communicate something sensitive
Choose dictation when:
- 📖 The recipient needs readable text
- 🔇 They may be unable to play audio
- 🔎 They might need to search the message later
- 📍 You are sharing an address or exact detail
- 💼 The conversation needs a more formal record
Apple places Dictation on the keyboard, while audio messages appear through the Add menu in Messages.
What Happens After You Send the Recording? ⏳
After sending the voice message, it appears inside the conversation. The recipient can tap the Play button to hear it.
By default, audio messages may disappear from your iPhone’s conversation two minutes after you send or listen to them. Apple uses this setting to reduce storage use.
This removal only affects the copy displayed on your device. The recipient can still play the recording after receiving it.
However, the recipient should tap Keep within two minutes after listening if they want it saved in their conversation.
Do not rely on a temporary voice message for critical information. Important details should also appear in written form.
Examples include:
- 📍 Addresses and meeting locations
- 📅 Appointment dates and times
- 💳 Payment or account information
- ✈️ Travel schedules
- 🔐 Important instructions
- 📞 Essential phone numbers
A written follow-up gives the recipient something easy to check later.
How to Keep Voice Messages Permanently 💾
You can prevent audio messages from expiring automatically.
Follow these steps:
- ⚙️ Open the Settings app.
- 📱 Scroll down and tap Apps.
- 💬 Select Messages.
- 🎙️ Find the Audio Messages section.
- ⏳ Tap Expire.
- ♾️ Choose Never.
Once selected, your iPhone will keep audio messages instead of removing them after two minutes. Apple documents this setting within the Messages options.
Remember that saved audio uses storage space. Therefore, remove old recordings occasionally when you no longer need them.
You can also tap Keep beneath an individual audio message. This option saves that particular recording without changing the setting for every future message.
When Voice Messages Feel Most Useful 🌟
Voice messages work best when speaking feels easier or more meaningful than typing.
For example, you may use one to:
- 🎂 Send a warm birthday wish
- 🙏 Comfort someone during a difficult day
- 👶 Share a child’s sweet greeting
- 💼 Explain a quick workplace update
- 🛒 Clarify shopping or household instructions
- 😂 Tell a funny story with the right tone
- 🫶 Check on someone who feels lonely
- 🌙 Say good night to a loved one
- ✈️ Update family while travelling
- 🎓 Congratulate someone on an achievement
Still, consider the receiver’s situation. They may be at work, in class, or somewhere quiet.
A short written note can help:
“Listen whenever you have a free moment.”
That simple line removes pressure and lets the recipient respond at a comfortable time.
How to Save an Audio Message on iPhone 💾
An important voice message may contain a memory, instruction, or meaningful conversation. Fortunately, you can save it instead of letting it disappear.
To keep the recording inside the Messages conversation:
- 💬 Open the conversation containing the audio message.
- 🎧 Play the voice message if you have not heard it.
- 📌 Tap Keep beneath the recording.
- ✅ Confirm that the audio remains inside the conversation.
By default, audio messages may disappear from your iPhone two minutes after you send or hear them. Tapping Keep prevents that individual recording from expiring.
Remember, the automatic deletion applies to the copy on your device. It does not immediately remove the recording from the recipient’s phone.
Save a Message to Voice Memos 🎤
You can also move an audio message from Messages into the Voice Memos app. This option works well for recordings you want to organize or replay later.
Follow these steps:
- 💬 Open the relevant conversation in Messages.
- 🎙️ Find the audio message you want to save.
- 👆 Touch and hold the recording.
- 📋 Choose Save to Voice Memos.
- 🔴 Open Voice Memos to find the saved recording.
Apple includes this option directly in the audio-message menu. Therefore, you do not need a separate recording application.
After saving it, rename the recording clearly. For example, use a title such as “Meeting Instructions” or “Birthday Message from Mom.”
Record a Longer Message with Voice Memos ⏱️
The Messages app works well for quick notes. However, Voice Memos may feel better for longer or more important recordings.
You can pause, resume, review, edit, and save a Voice Memos recording before sharing it. Apple also supports recordings through the built-in microphone, compatible headsets, and supported external microphones.
To create a recording:
- 🔴 Open the Voice Memos app.
- 🎙️ Tap the red Record button.
- 🗣️ Speak clearly into your iPhone.
- ⏸️ Pause when you need a moment.
- ▶️ Resume when you feel ready.
- ⏹️ Tap Stop when the recording is complete.
- ✏️ Tap its name to rename it.
Move the iPhone closer if your voice sounds too quiet. However, avoid placing the microphone directly against your mouth.
Voice Memos saves the recording automatically. If Voice Memos uses iCloud, recordings can also appear on other compatible Apple devices signed in to the same Apple Account.
Share a Voice Memo Through Messages 📤
After creating a Voice Memo, you can send it through Messages, Mail, AirDrop, or another supported sharing option.
Use these steps:
- 🎤 Open Voice Memos.
- 📂 Select the recording you want to send.
- ⋯ Tap the More Actions button.
- 📤 Choose Share.
- 💬 Select Messages.
- 👤 Choose the recipient.
- ⬆️ Tap Send.
Apple also lets users share several Voice Memos together. In addition, newer sharing options may let you choose a rendered or editable version.
A Voice Memo is useful when:
- ⏳ Your recording is longer than a normal voice note.
- ✂️ You want to edit the audio before sharing.
- 🏷️ You need to rename and organize the recording.
- 📁 You want to keep a separate audio file.
- 📧 You plan to send the recording through email.
- 💻 You want to transfer it to another device.
Export a Voice Recording to Files 📁
Saving a recording in Files gives you more control. You can place it inside a folder, attach it to an email, or upload it elsewhere.
Follow these steps:
- 🎙️ Open the Voice Memos app.
- 📌 Select your recording.
- ⋯ Tap the More button.
- 📤 Choose Share.
- 📁 Tap Save to Files.
- 🗂️ Select a folder.
- ✅ Tap Save.
Apple exports standard Voice Memos recordings in the .m4a format by default. Some advanced recording effects or layers may require different sharing options.
Use a clear filename before sharing. That small step helps the recipient understand the recording without opening it first.
Use Raise to Listen on iPhone 👂
Raise to Listen lets you hear an audio message by lifting the iPhone toward your ear.
To use it:
- 💬 Open a conversation containing an audio message.
- 👂 Raise the iPhone to your ear.
- ▶️ Wait for the message to begin playing.
- 📱 Lower the phone after listening.
- 👂 Raise it again to reply.
- 🗣️ Speak after hearing the tone.
- ⬆️ Tap Send when your reply is ready.
Apple supports both listening and replying through this movement-based feature.
Raise to Listen can make voice conversations feel more private. Instead of playing the recording through the loudspeaker, you hear it near your ear.
Turn Off Raise to Listen ⚙️
Some people activate Raise to Listen accidentally. For example, a message may begin playing when they simply move the phone.
You can turn the feature off:
- ⚙️ Open Settings.
- 📱 Tap Apps.
- 💬 Select Messages.
- 👂 Find Raise to Listen.
- ⛔ Turn the switch off.
Apple places this control inside the Messages settings. You can return later and enable it again.
Listen Faster or Move Through a Recording ⏩
Long audio messages can take time. Fortunately, the Messages app provides useful playback controls.
While listening, you can:
- ⏩ Slide across the recording to move forward.
- ⏪ Slide backward to hear something again.
- ⚡ Touch and hold Play or Pause to adjust playback speed.
- 📌 Tap Keep when the recording matters.
- 🎤 Save the message to Voice Memos for later.
These controls can help when someone sends detailed instructions or a long story.
However, replay important names, dates, and addresses carefully. Faster playback may make exact details harder to understand.
Use Audio Message Transcriptions 📝
Supported iPhone software can show a written transcript with an audio message. This feature helps when you cannot play the recording aloud.
However, transcription availability depends on the selected language and supported features. Apple notes that audio-message transcription works only in certain languages.
A transcript can be useful when:
- 🤫 You are sitting in a quiet place.
- 🏢 You receive a voice message at work.
- 👂 The recording sounds difficult to hear.
- 🔎 You need to find one detail quickly.
- 🌍 You communicate in a supported language.
- ♿ Written text improves accessibility for you.
Still, automatic transcripts may misunderstand names or unusual words. Therefore, play the original recording before acting on important information.
How to Send a WhatsApp Voice Message on iPhone 🟢
WhatsApp offers another way to send voice notes from an iPhone.
The usual process is simple:
- 🟢 Open WhatsApp.
- 💬 Choose the conversation.
- 🎙️ Use the microphone control beside the message field.
- 🗣️ Record your voice note.
- ⏸️ Pause when you need to gather your thoughts.
- ▶️ Review the message when the option appears.
- 📤 Send it when you feel satisfied.
- 🗑️ Delete it and record again when needed.
WhatsApp supports features such as pausing and resuming, waveform displays, draft previews, remembered playback positions, and faster playback.
Because app layouts can change, the exact icon position may differ slightly after an update.
Send a View Once Voice Message on WhatsApp 🔐
WhatsApp also supports voice messages that the recipient can play only once.
This feature can provide extra privacy for temporary information. However, avoid sending passwords, banking codes, or highly sensitive personal data through any messaging service.
WhatsApp marks View Once voice messages with a one-time icon. After the recipient plays the recording, it cannot be played normally again. WhatsApp states that personal voice messages use end-to-end encryption by default.
Use View Once carefully for:
- 🎁 A temporary surprise detail
- 🔔 A short private reminder
- 🗝️ Information that should not remain in the chat
- 📍 A temporary meeting instruction
For information someone may need later, send a standard message instead.
Tips for Clearer Voice Messages ✨
A good recording should feel easy to understand. It does not need professional sound quality.
Use these practical tips:
- 🔇 Move away from loud televisions or traffic.
- 📏 Keep the phone a comfortable distance away.
- 🗣️ Speak slowly and clearly.
- 📝 Think about your main point before recording.
- ⏱️ Keep each voice note reasonably short.
- 🔁 Review important recordings before sending.
- 📍 Repeat addresses or dates when necessary.
- 💬 Add a written summary for essential details.
- 🤝 Respect the recipient’s time and situation.
- 🎧 Use compatible earphones when the room feels noisy.
A warm, natural message often sounds better than a perfect one. So, speak calmly and let your real personality come through.
Why the Audio Option Is Missing on iPhone 🎙️
The Audio button normally appears after you tap the Add (+) button inside a Messages conversation. Apple currently places audio messages within this menu.
When the option does not appear, try these checks:
- ➕ Open the complete Add menu: Tap the plus button beside the message field and look through the available options.
- 🔄 Close and reopen Messages: Swipe away the app, then open the conversation again.
- 📱 Restart your iPhone: A restart can clear a temporary Messages problem.
- ⬆️ Update iOS: Install the latest available software through Settings → General → Software Update.
- 💬 Check iMessage: Open Settings → Apps → Messages and confirm that iMessage is turned on.
- 📞 Verify your phone number: Open Send & Receive and select the correct number for Messages.
Apple recommends updating iOS, checking the active phone line, restarting iMessage, and selecting the correct number when Messages behaves incorrectly.
Fix Microphone Permission Problems 🔐
An app needs microphone access before it can record your voice. Therefore, check privacy settings when recording never begins or produces no sound.
Follow these steps:
- ⚙️ Open Settings.
- 🔒 Tap Privacy & Security.
- 🎤 Select Microphone.
- ✅ Allow microphone access for the relevant app when it appears.
- 🔁 Reopen the app and test another recording.
Apple lets users review microphone access through Settings → Privacy & Security → Microphone. The list displays apps that previously requested permission.
The Messages app may not always appear like a third-party app. Therefore, test the microphone through Voice Memos when the permission list looks normal.
Test the iPhone Microphone 🎧
A failed voice message may come from the microphone rather than Messages.
Use Voice Memos for a quick test:
- 🔴 Open Voice Memos.
- 🎙️ Tap the Record button.
- 🗣️ Speak toward the bottom of your iPhone.
- ⏹️ Stop the recording.
- ▶️ Play it back.
- 👂 Check whether your voice sounds clear.
Apple recommends this exact test when people cannot hear you clearly.
When the sound remains quiet or distorted:
- 🧤 Remove thick cases or protective covers.
- 🧹 Clear visible debris from the microphone openings.
- 🎧 Disconnect Bluetooth earphones temporarily.
- 🔌 Remove accessories connected to the charging port.
- 📹 Record a short video and compare the sound.
- 🛠️ Contact Apple Support when every recording remains unclear.
Apple advises removing cases or films, clearing the openings, and testing different microphones through Voice Memos and Camera.
Fix a Voice Message That Will Not Send 📤
Recording may work correctly while the message still refuses to send. In that case, check your connection and Messages setup.
Try these solutions:
- 📶 Check Wi-Fi or mobile data: iMessage needs an active internet connection.
- 🔁 Tap Try Again: Select the red exclamation mark when the message shows “Not Delivered.”
- 📱 Restart the iPhone: Reconnect the device to the network.
- 💬 Turn iMessage off and on: Use Settings → Apps → Messages.
- 📞 Select the correct number: Check Messages → Send & Receive.
- 👤 Verify the recipient: Confirm their phone number or Apple Account address.
- 🆕 Start a new conversation: An older thread may use the wrong sender address.
- 🔊 Shorten the recording: Send two smaller voice notes instead of one long file.
Apple advises checking the network, tapping Try Again, verifying the recipient, and confirming the correct phone number under Send & Receive.
Fix Voice Messages After Changing iPhones 🔄
Messaging settings may not transfer perfectly when you set up a new iPhone.
Complete these checks:
- 📲 Update the new iPhone to the latest iOS version.
- 📡 Open Settings → Cellular and confirm your line is active.
- 📶 Select the correct SIM when you use more than one line.
- 💬 Turn iMessage off and back on.
- 📞 Open Send & Receive and select your phone number.
- 🆕 Start a fresh conversation after correcting the number.
Apple recommends these steps when Messages develops separate threads or uses the wrong address after device setup.
Common Voice Message Mistakes to Avoid ⚠️
Small mistakes can make an otherwise useful recording frustrating.
- 📢 Recording in a noisy room: Background sound may cover your voice.
- 🤫 Speaking too quietly: Keep the phone close enough for clear audio.
- ⏳ Sending one very long message: Divide complex information into shorter recordings.
- 📍 Sharing exact details only by audio: Send addresses and dates in writing too.
- ❌ Sending without reviewing: Play important recordings before delivery.
- 🔐 Sharing private information: Avoid passwords, payment codes, and sensitive account details.
- 🚗 Recording while driving: Wait until you can use the phone safely.
- 💾 Forgetting to tap Keep: Important audio may disappear from your conversation.
Apple states that audio messages can disappear from the sender’s conversation after two minutes unless the user taps Keep or changes the expiry setting to Never.
Frequently Asked Questions About iPhone Voice Messages ❓
Can I send a voice message from the iPhone Messages app?
Yes. Open a conversation, tap the Add (+) button, choose Audio, speak, stop the recording, and tap Send. You can also review, continue, or cancel it first.
Why did my voice message disappear?
Audio messages may disappear from your conversation two minutes after you send or hear them. Tap Keep to save one message.
For all future recordings, open Settings → Apps → Messages → Expire, then choose Never.
Can I listen to a voice message before sending it?
Yes. Tap the Stop button after recording, then select Play. You can review the complete message before choosing Send.
Can I add more audio to the same recording?
Yes. After stopping, tap the Continue Recording control. Your new audio will be added to the end of the existing recording.
Can I save an audio message outside Messages?
Yes. Touch and hold the audio message, then choose Save to Voice Memos.
Why is my voice message silent?
Your microphone may be blocked, dirty, covered, or unavailable to the app. Test it with Voice Memos and review microphone access under Privacy & Security.
Can I send a voice message without typing?
Yes. Audio messages let you send your actual recorded voice. Dictation is different because it converts speech into written text.
Conclusion 🌟
Learning how to send a voice message on iPhone takes only a few moments. Open Messages, tap the Add button, select Audio, and begin speaking.
Still, the review controls make the feature especially useful. You can listen, continue recording, cancel mistakes, or send the message when it sounds right.
Voice messages work beautifully when tone matters. A birthday wish feels warmer, an explanation becomes clearer, and a caring check-in sounds more personal.
However, keep the recipient in mind. Short recordings respect their time, while written follow-ups protect important dates, addresses, and instructions.
When the feature stops working, begin with simple checks. Restart Messages, verify iMessage, confirm your number, test the microphone, and update iOS.
A calm step-by-step approach usually reveals the cause.
“Sometimes, hearing a familiar voice brings more comfort than reading a hundred carefully written words.”